How to deliver a reader magnet with Brevo
· 6 min read
Brevo (formerly Sendinblue) has one of the most generous free plans of any email service, with room for a large list and automations included. This guide connects it to Storyfinch so every reader who picks up your free book is added to a Brevo list automatically.
Brevo has two security features that can quietly stop new readers being added months after you set things up, so read the "Keep the connection working" section even if the rest feels familiar.
What you need
- A Brevo account.
- Your reader magnet as an EPUB, a PDF, or both, plus a cover image.
- Storyfinch Pro for the automatic connection. On the free plan you can download your new readers as a spreadsheet and import them into Brevo yourself.
Step 1: Create a list
In Brevo, go to CRM → Contacts → Lists and click Create a list. Name it for this book, for example "Book 1 reader magnet", choose a folder (every Brevo list lives in one), and create it. Storyfinch adds each reader's email address and, if they gave it, their first name to Brevo's FIRSTNAME attribute.
Step 2: Create an API key (not an SMTP key)
Brevo has two kinds of key, and only one works here.
- Open your account menu and choose Settings → SMTP & API.
- Go to the API Keys & MCP tab and click Generate a new API key. Brevo sends a verification code to your device to confirm it is you.
- Name the key (for example "Storyfinch"). Leave the MCP option switched off, and for the expiry choose no expiration.
- Copy the key. Brevo only shows it once.
Do not use a key from the SMTP tab. SMTP keys are for sending email through Brevo's mail servers and will not connect.
Step 3: Connect Brevo in Storyfinch
In Storyfinch, open Integrations, choose Brevo, and add a connection. Name it (your pen name works well) and paste the API key. Storyfinch checks it straight away and stores it encrypted.
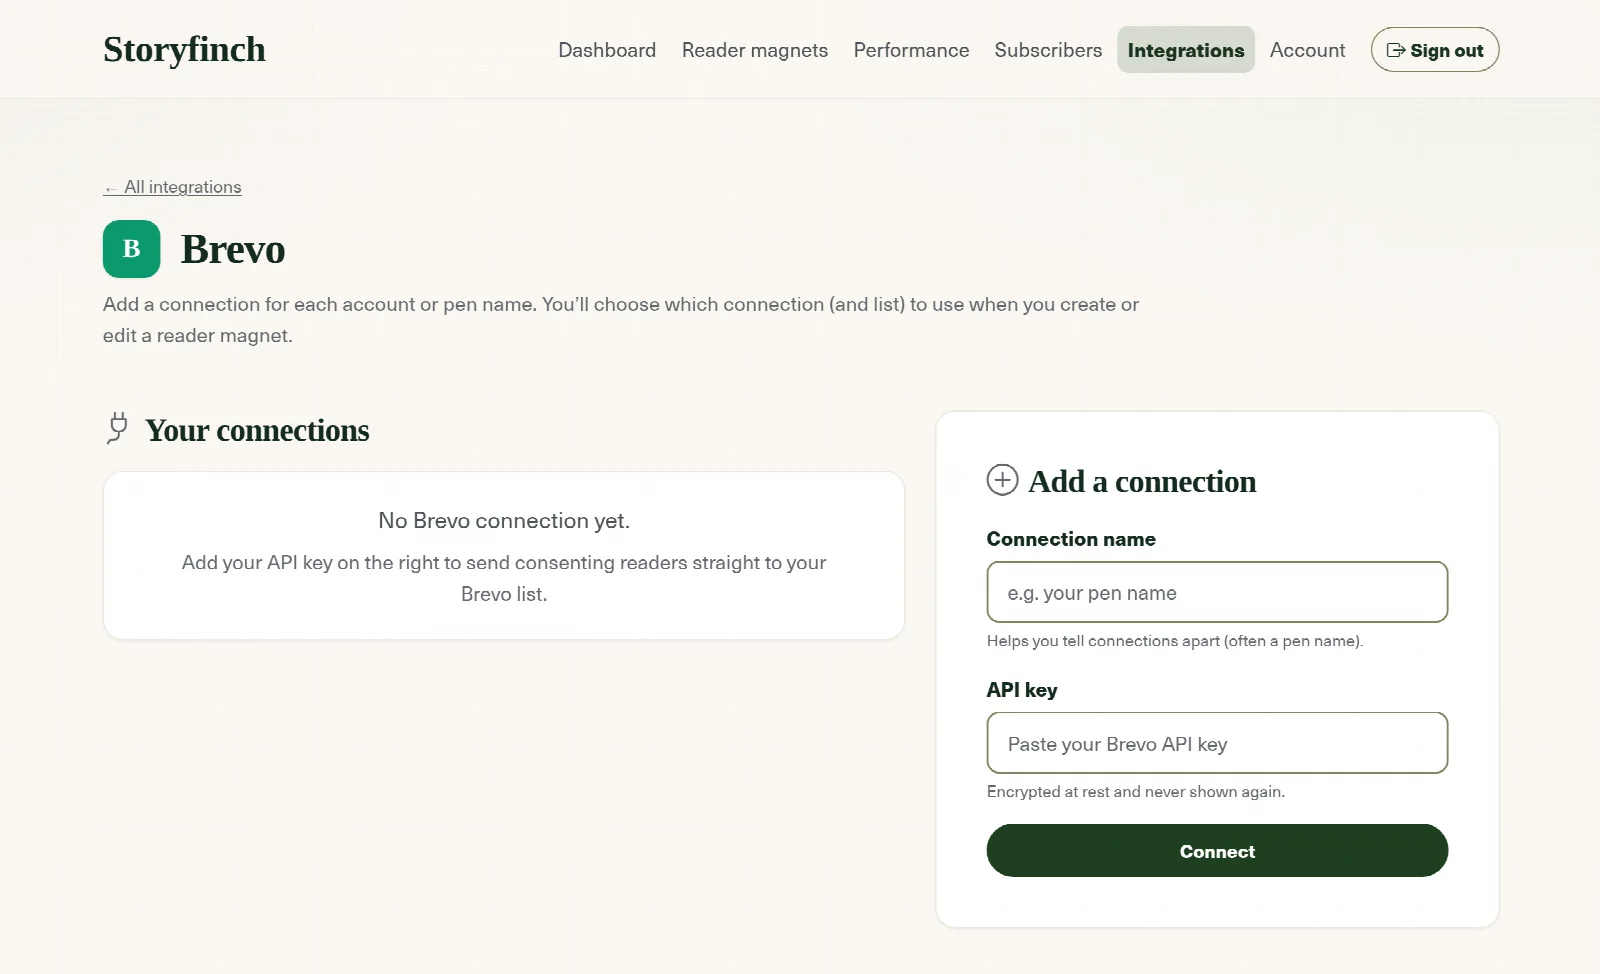
Step 4: Choose the list for your reader magnet
In your reader magnet's settings, under the mailing list options, pick your Brevo connection and the list from step 1. Every reader who signs up and agrees to join your list is then added to it. If a reader is already in Brevo, their existing contact is updated rather than duplicated.
Readers who do not tick the box to join your list are not sent to Brevo. And because Storyfinch records each reader's consent, Brevo does not send them a separate confirmation email. If you want readers to confirm their address before they get the book, switch that on in Storyfinch. See single vs double opt-in.
Step 5: Send a welcome email
Storyfinch delivers the book, so Brevo handles the follow-up. In Brevo, go to Automations → Workflows → Create an automation and choose the ready-made Welcome message. Pick your reader magnet list, set the delay (you can remove it to send straight away), and design the email. It starts when a contact is added to the list.
Only people added after the automation is switched on are included, so set it up before you share your link. Then test it: sign up on your own Storyfinch page with an address you can check. Our welcome email sequence guide has an outline to adapt.
Keep the connection working
Two Brevo security features can stop new readers being added without any obvious error at your end:
- Unused keys are switched off after 90 days. Even with no expiry date, Brevo deactivates an API key that has not been used successfully for 90 days, and emails you a reminder a week before. If your reader magnet has quiet spells, click Test on your Brevo connection in Storyfinch now and then, which uses the key. If the key has already been switched off, create a new one and reconnect.
- Brevo can block new IP addresses. Brevo learns which addresses use your key, then after 30 days with no new ones it starts blocking unfamiliar addresses and emails you about it. If you get that email about a connection you made for Storyfinch, approve the address in Brevo under Settings → Security → Authorized IPs.
If readers stop appearing in Brevo, check the failed sign-ups on your Storyfinch dashboard first. Readers still get their book either way.
Brevo's free plan
As of October 2026, Brevo's free plan stores up to 100,000 contacts and sends up to 300 emails a day, with a "Sent with Brevo" mark on your emails. Automations are included, for up to 2,000 contacts, which is plenty for a reader magnet welcome email. The daily limit matters if you email a big list at once; check Brevo's pricing page for current figures.
Frequently asked questions
Where do I find my Brevo API key?
Account menu → Settings → SMTP & API → the API Keys & MCP tab → Generate a new API key. The key is only shown once, so copy it straight away.
Why won't my Brevo key connect?
The most common reason is using a key from the SMTP tab, which is for sending mail rather than the API. Create a key on the API Keys & MCP tab instead.
Why have new readers stopped appearing in Brevo?
Brevo may have switched off a key that was not used for 90 days, or blocked an unfamiliar IP address. Check your Brevo emails and the failed sign-ups on your Storyfinch dashboard, then reconnect with a new key or approve the address in Brevo.
Does Brevo send readers a confirmation email?
No. Storyfinch adds readers who agreed on your signup page directly to your list and keeps the record of their consent. Turn on confirmation in Storyfinch if you want readers to confirm their address.
Is Brevo's free plan enough for a reader magnet?
Usually, yes. It stores up to 100,000 contacts and includes automations for up to 2,000 contacts. The main limit is 300 emails a day, which matters if you send a newsletter to a large list.
Grow your list with your next book
Give readers a free book and turn them into subscribers, with secure delivery and consent built in.
Create your free accountFree plan · No card required · Set up in minutes